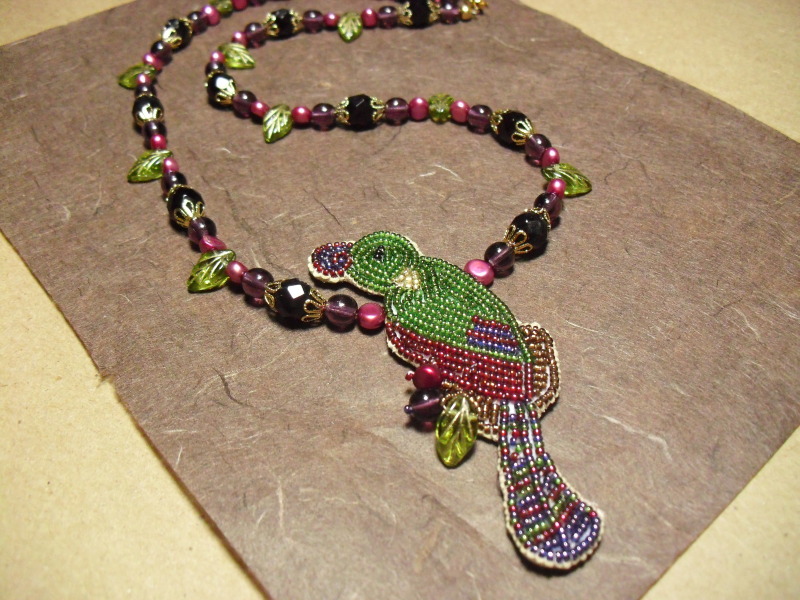
Bead Embroidery Bird
Bead embroidery is a very versatile and beautiful technique. This tutorial shows how to bead embroider an image. This technique can be easily adapted to different images. You can draw your own image on stiffened felt and embroider with beads. This technique works best with simple images. Too much detail in the image will be difficult to embroider.
Materials:
Tools:
- Stiffened Felt, white
- Nymo Size B, tan
- Ultrasuede, tan
- Czech pressed leaf beads
- 6 mm Czech druk beads, amethyst
- 5 mm freshwater pearls, burgundy
- 8 mm Czech fire polished beads, dark red
- Gold plated bead caps
- Size 15 rocailles, Green
- Size 15 rocailles, Burgundy
- Size 15 rocailles, Violet
- Size 15 rocailles, Silver lined gold
- Size 15 rocailles, Silver lined brown
- Size 15 rocailles, Black
- Glue
- Scrap card stock
- Beading wire
- Crimp Beads
- Gold plated clasp
Tools:
- Scissors
- Beading needle
- Pencil
- Crimping pliers
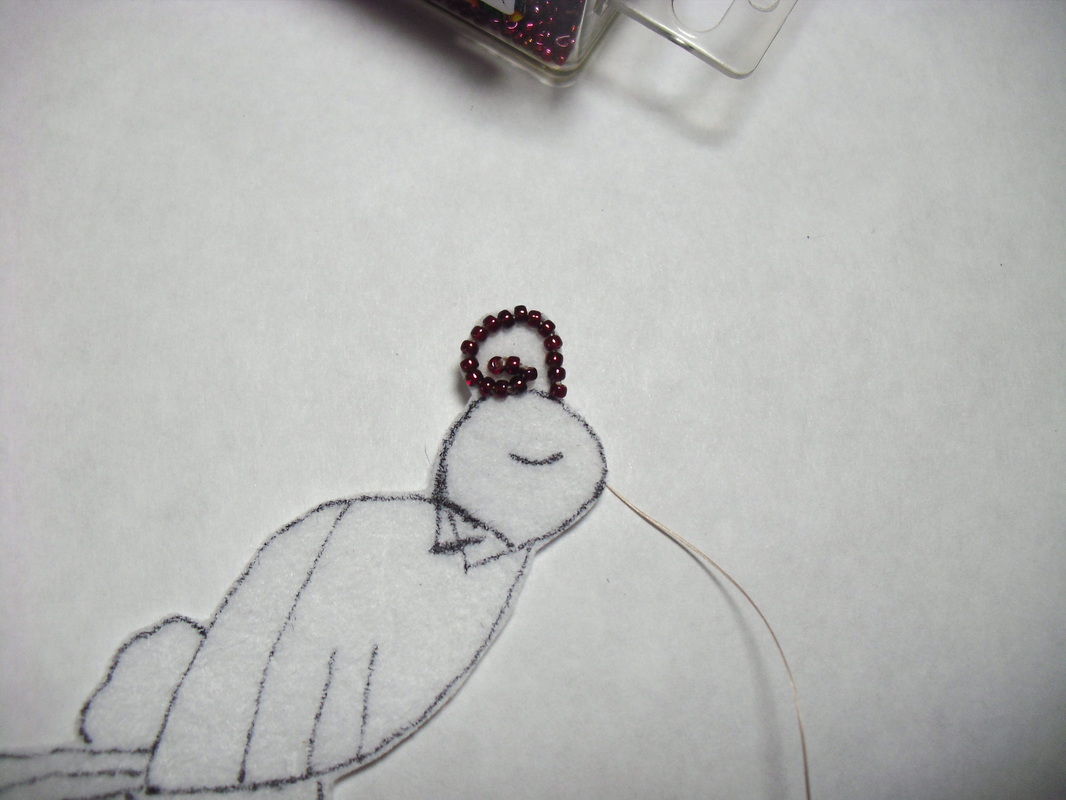
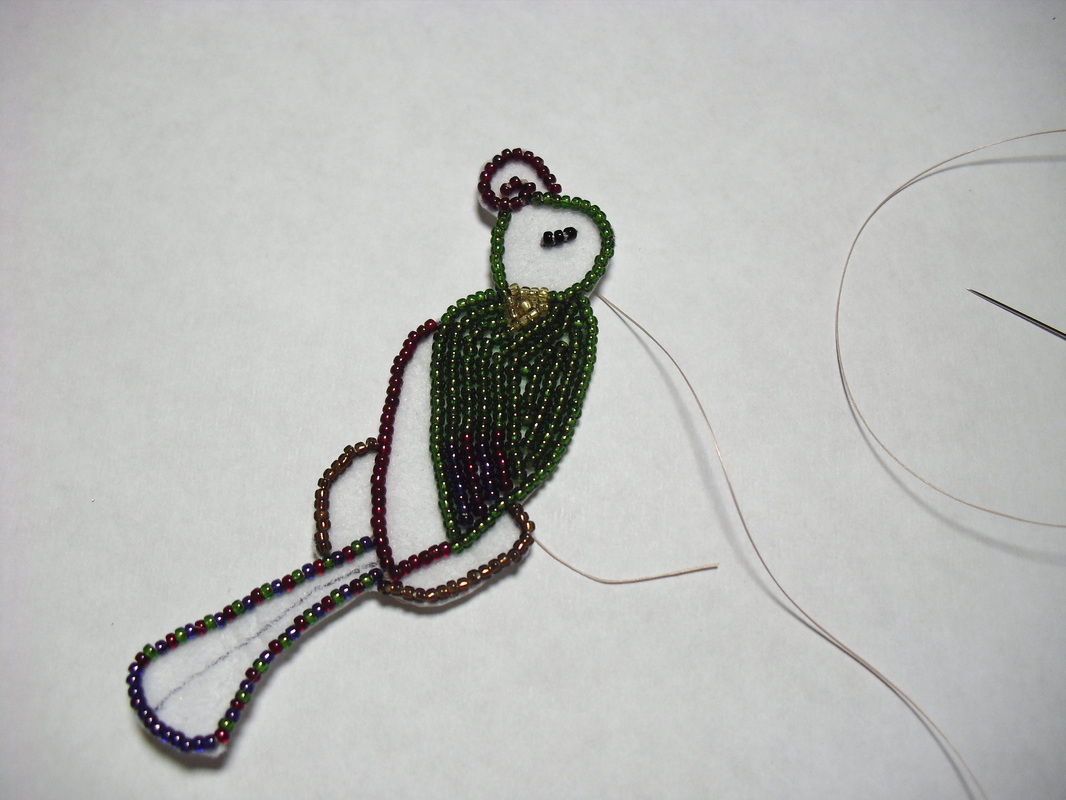
Step 1: Draw or trace an image on a piece of stiffened felt then cut around the piece. Prepare a length of nymo and thread. Begin adding beads by backstitching along the outlines.
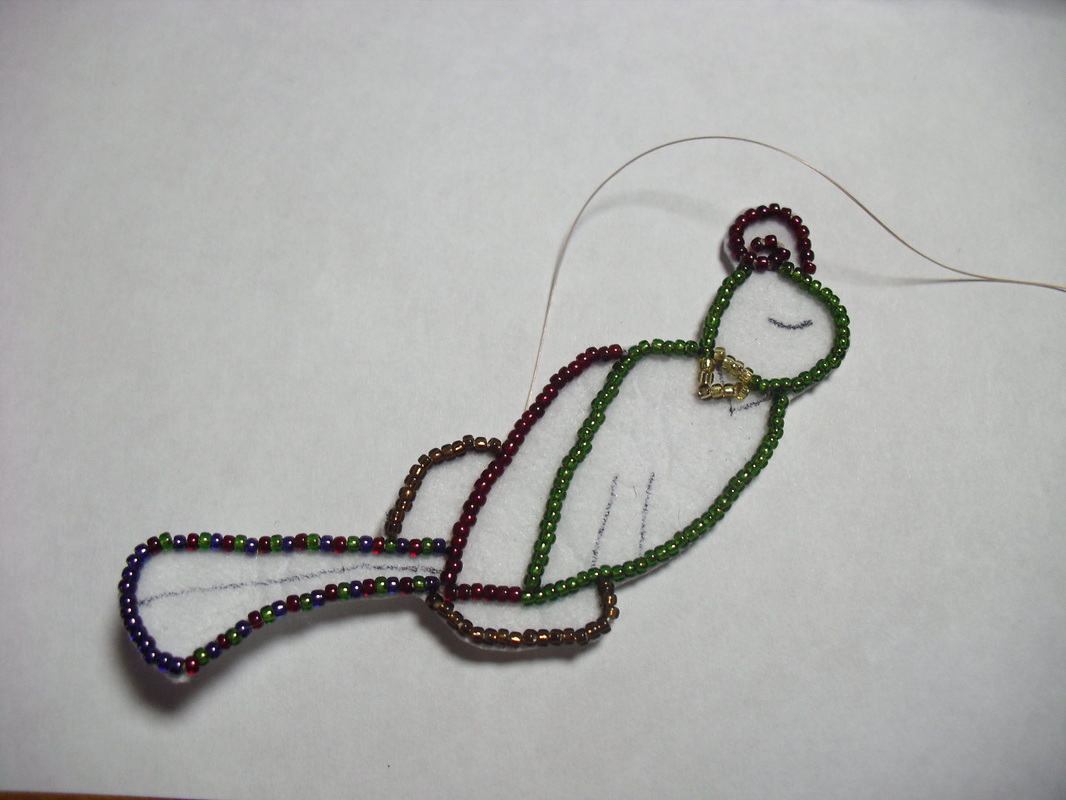
Step 2: Once you have backstitched along the outlines, begin filling in the image. Knot the thread and add new lengths as needed.
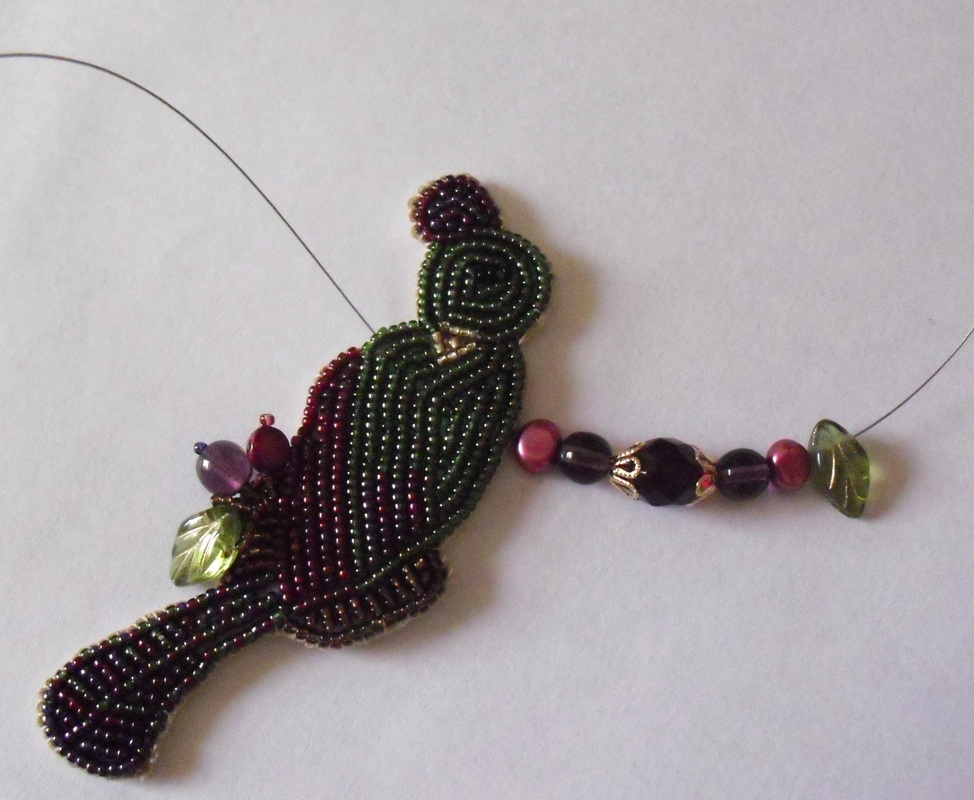
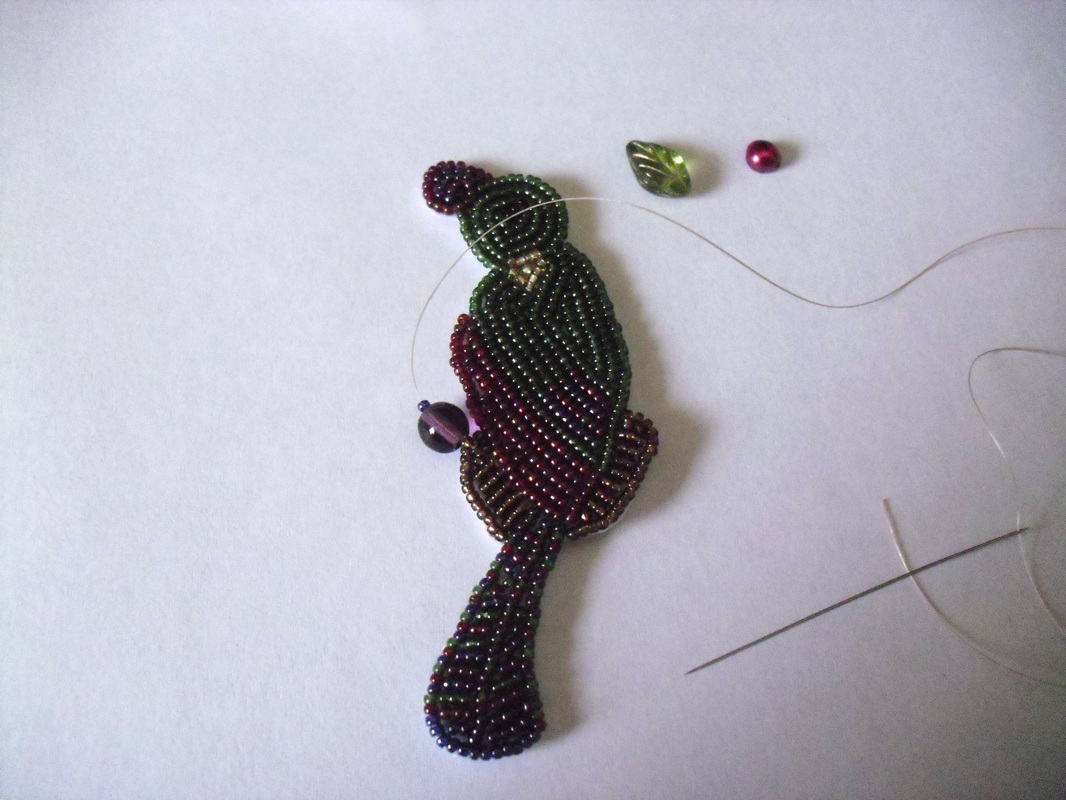
Step 3: After filling in the image, use a druk bead, a leaf bead and a pearl to add fringe to the nest part of the image.

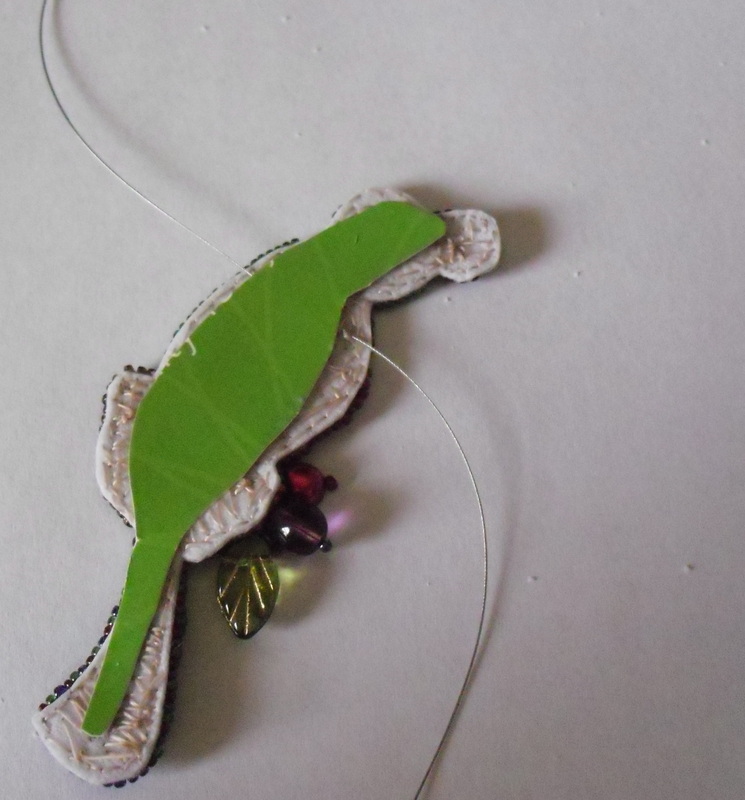
Step 4: Trim a length of beading wire and sew to the back of the piece using nymo thread.

Step 5: Glue a piece of scrap card stock to the back of the piece for support.
Step 6: Glue the image to a piece of ultrasuede. Trim around the piece leaving about 1/8 inch of fabric.

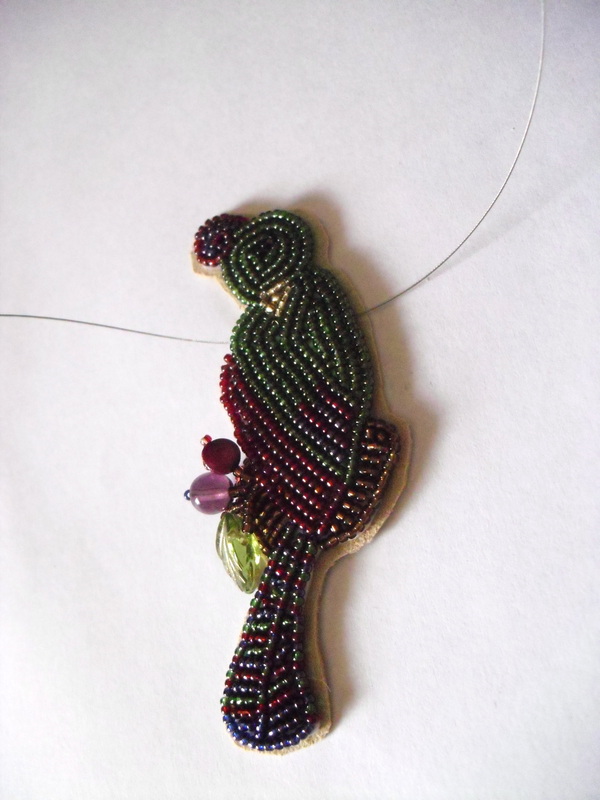
Step 7: Using sewing thread, stitch through the ultrasuede, pass through a bead, and back through the ultrasuede. Continue all around to secure the fabric to the embroidered piece.

Step 8: String beads onto the beading wire as shown below. Once the necklace is as long as you like, add the clasp with crimp beads.