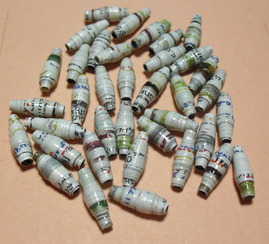
How To Make Beads From Paper

Paper beads are extremely easy to make and they are also very inexpensive. You should begin by using recycled paper from a catalog or old magazine to make sure you have the technique down. Once you develop a knack for it, try using decorative papers for really amazing beads. Make sure to seal your beads well with varnish or some type of gloss. Otherwise they will deteriorate.
Paper beads can be made into several shapes. For this tutorial the bead will have an oval shape. There are two sets of instructions, one for making the beads by measuring the paper and the other for making the beads from a template. If you don't like measuring, try printing out a template or making your own from cardstock. Experiment using diferent lengths and widths of paper. Longer lengths will make bigger beads as will heavier papers.
Paper beads can be made into several shapes. For this tutorial the bead will have an oval shape. There are two sets of instructions, one for making the beads by measuring the paper and the other for making the beads from a template. If you don't like measuring, try printing out a template or making your own from cardstock. Experiment using diferent lengths and widths of paper. Longer lengths will make bigger beads as will heavier papers.
Below is a free template for various paper bead shapes.
| paper_bead_templates.docx |
Paper Beads without a Template:
Materials:
Paper
School Glue
Varnish or Gloss
Tools:
Ruler
Scissors
Pen
Round Toothpick
Paper
School Glue
Varnish or Gloss
Tools:
Ruler
Scissors
Pen
Round Toothpick
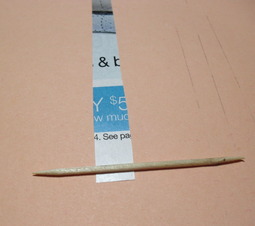
Step 1: Measure and mark your paper. Mark one end of your paper every 1/2 inch. Repeat with the opposite side of the paper.
Other edge of the paper
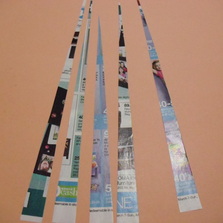
Step 2: Using the ruler, make a line connecting the first mark on one side of the paper to the second mark on the other side. Basically, make a diagonal line and continue zig-zagging so that you form triangular shapes.
Step 3: Cut out the triangles

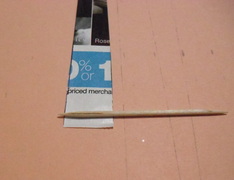
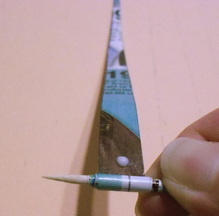
Step 4: Beginning with the base of the triangle, begin rolling the paper with a toothpick. Make it snug. Once you've rolled it a few times, add a small dab of glue. Roll it a little more and add another small dab of glue. Continue until you have rolled the entire paper.


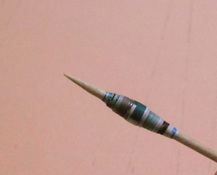
Step 5: Carefully remove the bead from the toothpick and let it dry.
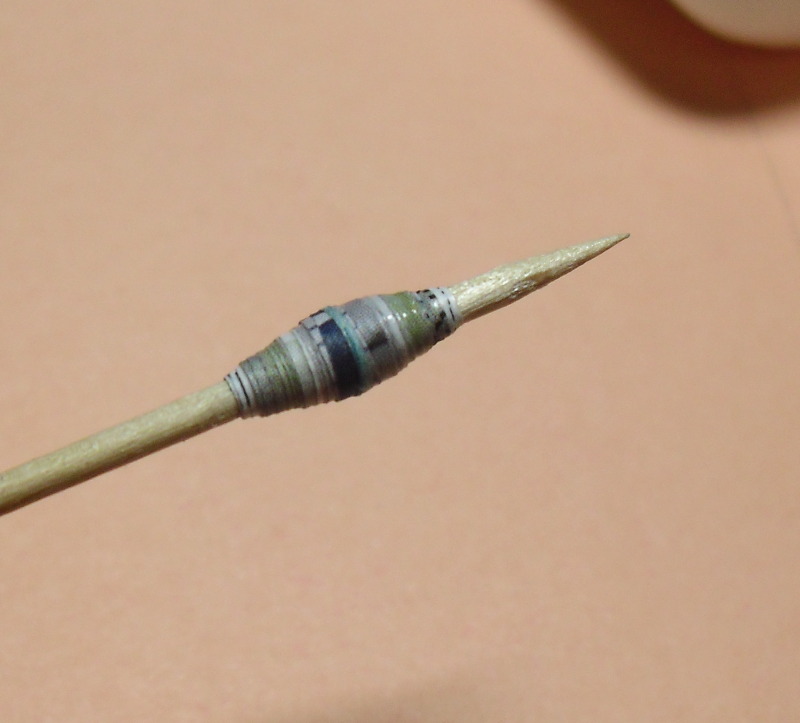
Step 6: Seal your bead with varnish.
Paper Beads made from the Template
Materials:
Paper
Heavy Cardstock
School Glue
Gloss or Varnish
Tools:
Pen
Scissors
Toothpick
Paper
Heavy Cardstock
School Glue
Gloss or Varnish
Tools:
Pen
Scissors
Toothpick
Step 1: Print out the templates on heavy cardstock and cut out the shapes. For this bead you will need a triangle shape. Trace the triangle onto your desired paper.
Step 2: Cut out the triangles.
Step 3: Use a toothpick to begin rolling the paper around the toothpick from the base of the triangle. Keep the tension tight, this may take practice.
Step 4: Add small dots of glue as you roll the paper to strengthen the bead.
Step 5: Once you have rolled the paper completely, remove the bead from the toothpick and let the glue dry. Once it dries, place it back on a toothpick and coat the bead with several layers of gloss or varnish.